Integrating tracknow to Wix website
First, configure passing the required click_id parameter in your campaign to the Wix website by:
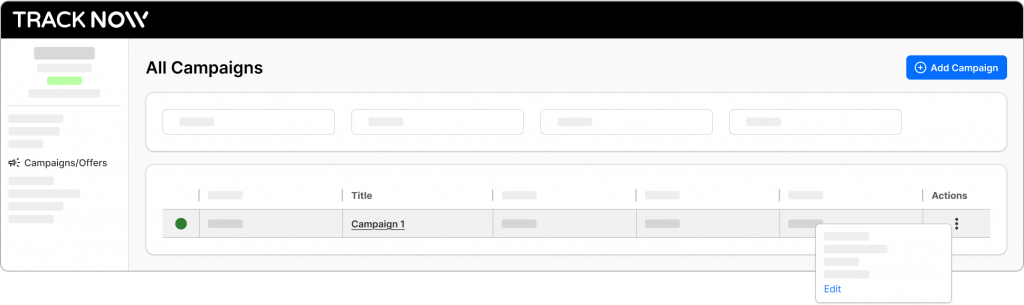
Login to your dashboard and navigate to Campaigns/Offers.
Click the Actions button next to the relevant campaign and select Edit.
Navigate to the Tracking screen.
Add the click_id macro to the Landing Page URL and to Deep Links and click Save.

Now, each time a client clicks an affiliate link, he will be directed to your landing page with his click_id in the URL

Next, we’ll need to store the passed click_id on thee Wix website. This can be done by adding the following script to the header section so that the script will be available on all pages:
Open your Wix dashboard and go to Settings > Custom Code > Add Custom Code to the head section and choose to load code on each new page.
<script>
import wixLocation from 'wix-location';
import { local } from 'wix-storage';

$w.onReady(function () {
  const clickId = wixLocation.query.click_id;

  if (clickId) {
    local.setItem("click_id", String(clickId));
  }
});
</script>
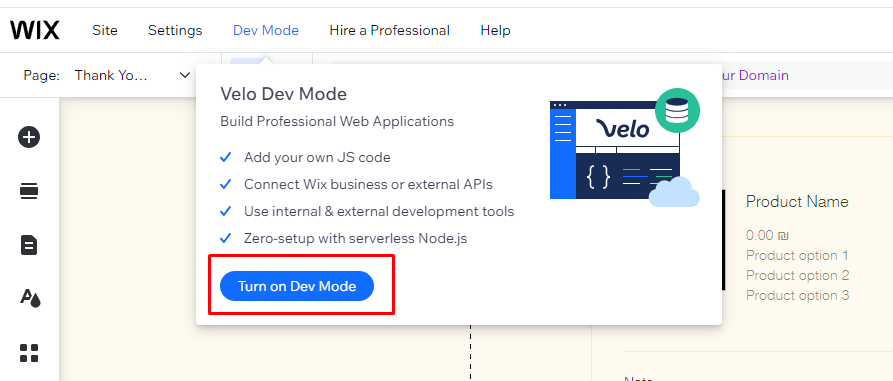
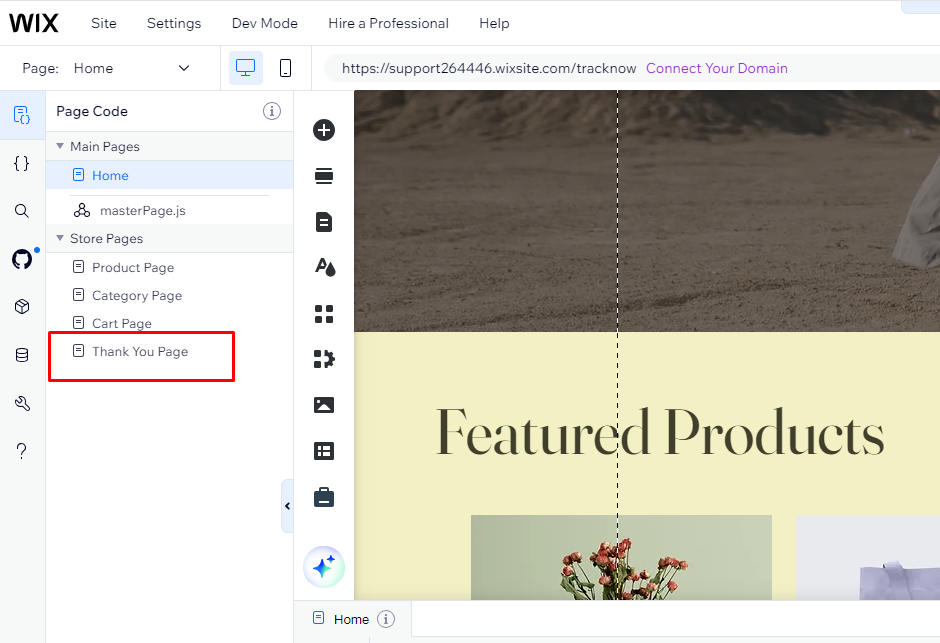
Next, you’ll need to edit the site and enable dev mode if it isn’t on already.
Click “My Store” on the left menu, then “Store Pages”, and select “Thank You Page”.
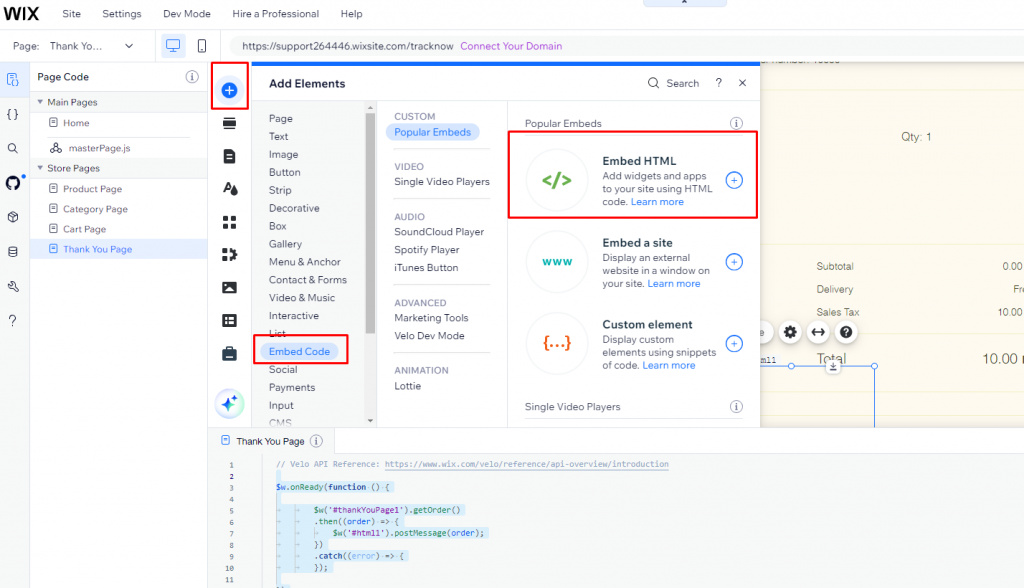
Add an HTML embedded code by clicking “Add” > “More” > “Embeds” on the left menu. and add the following code:
<script type="text/javascript">
  window.onmessage = (event) => {
    const data = event.data;
    if (!data || data.type !== "ORDER_AND_CLICK") return;

    const order = data.order;
    const clickId = data.click_id || "";

    // --- Calculate amount WITHOUT shipping ---
    const orderTotal = Number(order?.totals?.total ?? 0);

    const shippingAmount =
      Number(order?.totals?.shipping ?? 0) ||
      Number(order?.shippingInfo?.shippingFee ?? 0);

    const amountWithoutShipping = Math.max(
      0,
      (orderTotal - shippingAmount).toFixed(2)
    );

    // --- Extract coupon code (if any) ---
    let couponCode = "";
    if (order?.discount?.coupon?.code) {
      couponCode = order.discount.coupon.code;
    } else if (Array.isArray(order?.discounts) && order.discounts[0]?.coupon?.code) {
      couponCode = order.discounts[0].coupon.code;
    }

    var img = document.createElement("img");
    img.src =
      "https://{replace with your Tracknow namespace}-tracking.tracknow.info/success.jpg" +
      "?campaign_id={replace with actual campaign ID}" +
      "&amount=" + encodeURIComponent(amountWithoutShipping) +
      "&order_id=" + encodeURIComponent(order?.number ?? "") +
      "&click_id=" + encodeURIComponent(clickId) +
      "&coupon=" + encodeURIComponent(couponCode);

    img.height = "1";
    img.width = "1";
    img.style.display = "none";
    document.body.appendChild(img);
  };
</script>
Please ensure that you adjust the URL to have your namespace and that you adjust the campaign value as well.
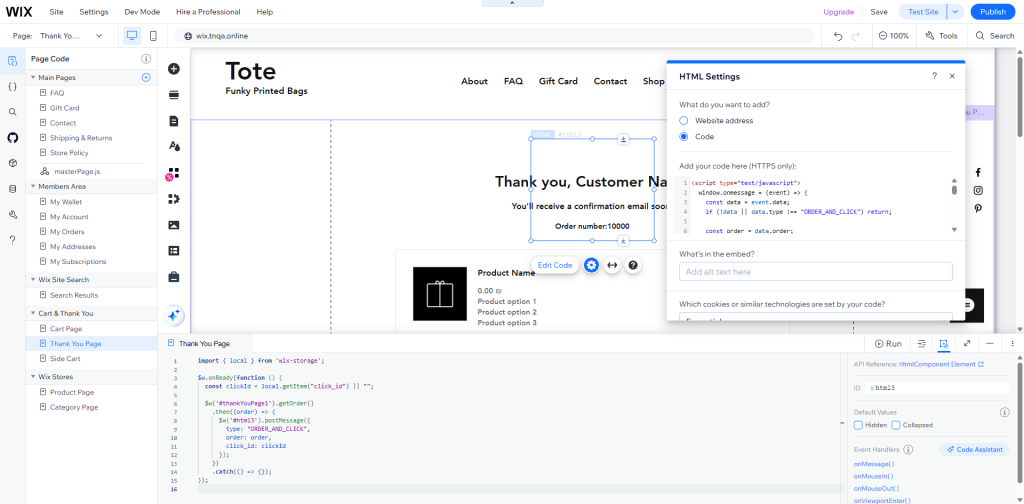
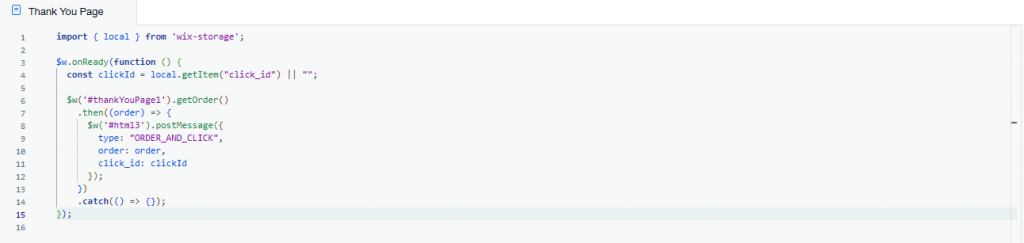
Add the following code to the Thank You Page code page and replace ‘thankYouPage1’ ID to the actual thank you page ID if it’s different and also replace embedded html id from “html3” to the ID Wix generated for that element.
import { local } from 'wix-storage';

$w.onReady(function () {
  const clickId = local.getItem("click_id") || "";

  $w('#thankYouPage1').getOrder()
    .then((order) => {
      $w('#html3').postMessage({
        type: "ORDER_AND_CLICK",
        order: order,
        click_id: clickId
      });
    })
    .catch(() => {});
});