What is a Tracking Pixel?
A tracking pixel, also known as a conversion pixel or a tracking code, is a small, transparent image or snippet of code embedded on a webpage. When a user visits the webpage, the tracking pixel is triggered, sending a signal to the affiliate platform or advertiser’s server. This signal records essential information about the user’s activity, such as the conversion event, referral source, and other relevant data.
How Does a Tracking Pixel Work?
Placement – Affiliates can place the tracking pixel on their websites or landing pages, typically within the HTML code.
Triggering – When a visitor reaches the webpage containing the tracking pixel, the pixel is activated, and a request is sent to the affiliate platform’s server.
Data Collection – The tracking pixel collects information about the user’s behavior, such as clicks, conversions, or other predefined events. This data is then transmitted back to the affiliate platform for analysis.
Attribution – The tracking pixel helps attribute conversions to specific affiliates, enabling accurate tracking of their performance and determining commission payouts.
Step-by-Step Guide to Integrating Your Tracking Pixel
Integrating a tracking pixel into your website is an easy process. Follow these simple steps to connect your website to the Tracknow affiliate tracking system, using a tracking pixel from the following options: S2S, IMAGE, JAVASCRIPT, and IFRAME.
To integrate a tracking pixel into an e-commerce platform, we provide tutorials on some of the most prominent e-commerce platforms. Please refer to the following instructions: E-Commerce Integration.
Step 1: Access Your Tracking Pixel
- Navigate to your Dashboard and click on ‘Campaigns.’
- To create a new campaign, click the ‘Add campaign‘ button on the right or click on an existing campaign.
- Click on the ‘Tracking‘ section and scroll down to ‘Conversion Tracking Setup‘.
Step 2: Choose Your Integration Method
- Review the available integration options: Server-to-Server (S2S), Image Pixel, JavaScript Pixel, or iFrame Pixel.
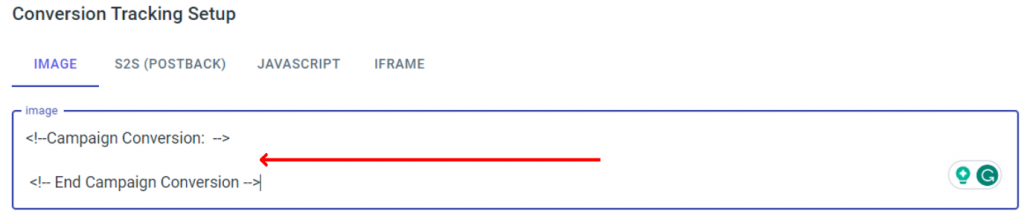
Step 3: Add the parameters to the ‘Conversion Tracking Setup’
For Example:
https://yourstore-tracking.tracknow.info/success.jpg?campaign_id=1&order_id=[order_id]&amount=[amount]Lifetime Payment Type Example
https://yourstore-tracking.tracknow.info/success.jpg?campaign_id=1&order_id=[order_id]&amount=[amount]&new_customer=[1/0]&customer_id=[customer identifier]Step 4: Embed the Tracking Pixel
Now, let’s proceed with integrating the tracking pixel into your website using the chosen method:
Server-to-Server (S2S) Integration:
- Access the backend of your website or content management system (CMS).
- Locate the relevant page or section where you want to place the tracking pixel.
- Insert the provided S2S tracking pixel code in the designated area.
- Save the changes.
Image Pixel Integration:
- Access the HTML source code of the webpage where you want to embed the tracking pixel.
- Find the appropriate location within the HTML code.
- Paste the provided image pixel code.
- Save the changes.
JavaScript Pixel Integration:
- Access the HTML source code of the webpage where you want to implement the tracking pixel.
- Look for the
<head>section of the code. - Paste the provided JavaScript pixel code within the
<head>section. - Save the changes.
iFrame Pixel Integration:
- Access the HTML source code of the webpage where you want to include the tracking pixel.
- Identify the spot where you want to embed the iFrame pixel.
- Insert the provided iFrame code at the chosen location.
- Save the changes.
Integrations Options Explained
Server-to-Server (S2S) – S2S integration involves establishing a direct connection between the affiliate platform and the website’s server. S2S integration is highly reliable and suitable for high-traffic websites.
Image Pixel – The image pixel integration method involves embedding a transparent image on the website. When a user visits the website, the image is loaded, and the tracking pixel code is executed.
JavaScript Pixel – JavaScript pixel integration involves adding a JavaScript code snippet to the website. This code is executed when the website is loaded, allowing the tracking pixel to collect data.
iFrame Pixel – iFrame pixel integration utilizes an HTML iframe element to embed the tracking pixel on the website. This method allows the pixel to function independently, isolated from the website’s main code. iFrame pixels offer a high level of compatibility and security. However, they may introduce additional complexities, such as cross-domain tracking limitations.

If you have any issues integrating a tracking pixel, please contact the ‘Tracknow’ Support Team by clicking ‘here‘, we will do our best to answer all of your inquiries.