Google Tag Manager is a tag management solution that allows you to set up and publish tags on your website or mobile app using a simple web-based interface.
Integrating GTM Tag on the Conversion Page
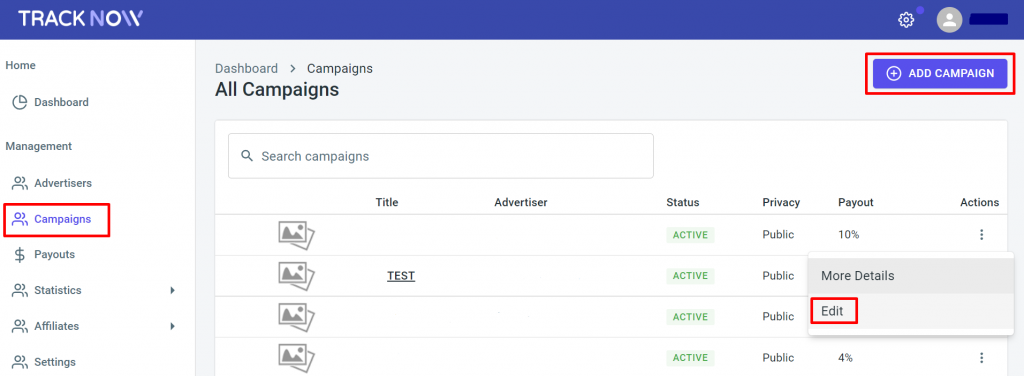
- First, navigate to the ‘Campaigns‘ section > ‘Add a Campaign‘ or ‘Edit‘ (for an existing campaign):
- After selecting a campaign, click on the ‘Tracking‘ tab > scroll to the bottom of the page and select the ‘S2S (POSTBACK)‘ section and copy the code.

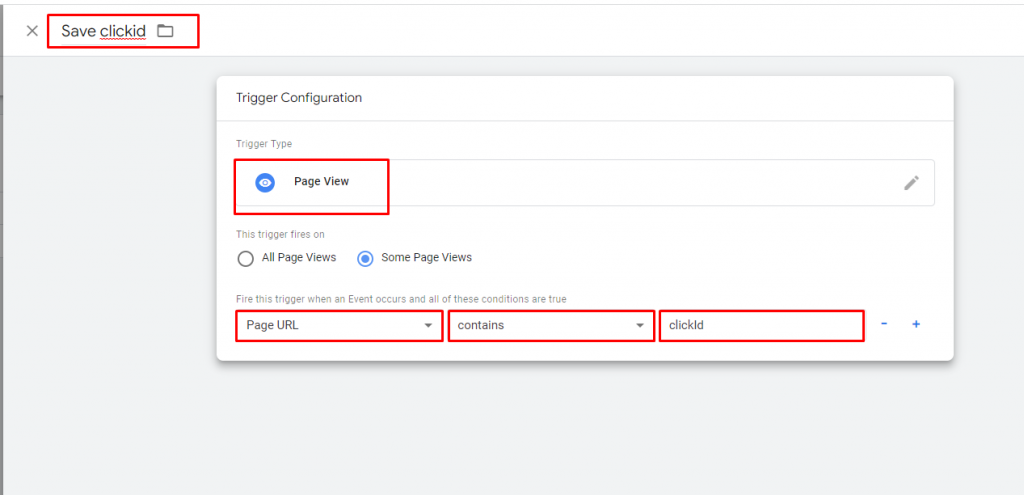
- On the ‘Google Tag Manager‘, you will need to save the ‘clickId‘ from the URL and save it to a cookie.
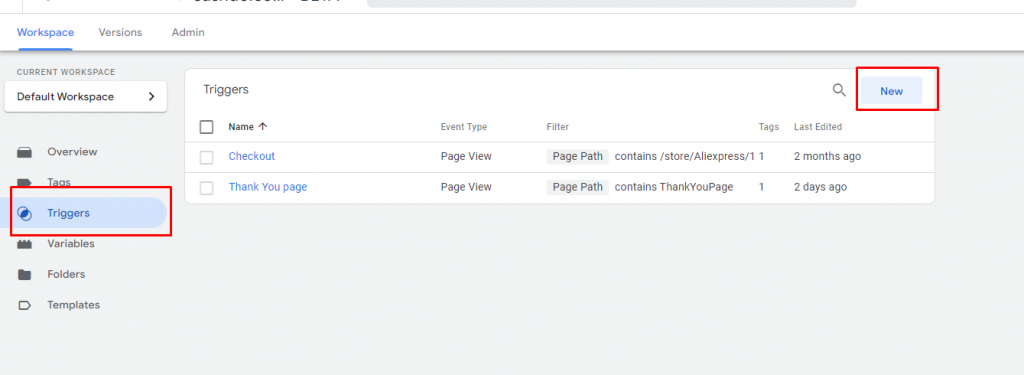
In order to do it, at the ‘GTM‘ > go to ‘Triggers’ > click on ‘New’ and select ‘Page View’ at the ‘Trigger Type‘.
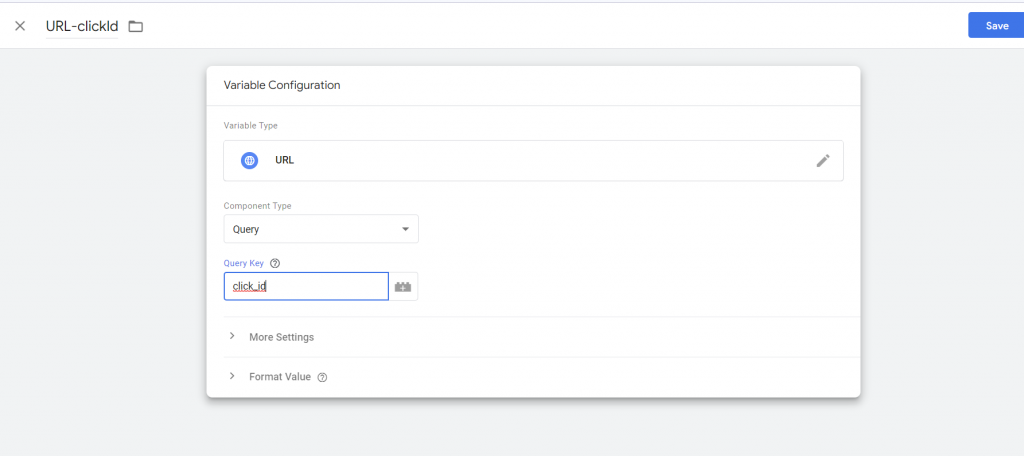
- Select ‘Variables’ > click on ‘New‘ and select ‘URL’ at the ‘Variable Type‘.
- Now you will need to save the ‘Click ID‘ into the ‘1st Party Cookie‘ and make it available on every page of the site.
In order to do it > go to ‘Tags‘ > click on the ‘New‘ button > and select ‘Tag Type’ as Custom HTML.
Place the following code into the HTML field:

<script language="javascript" type="text/javascript">
    function sc(v) {
    let d = new Date();
    d.setTime(d.getTime() + (365 * 24 * 60 * 60 * 1000));
    document.cookie = "tn_click_id=" + v + ";" + "expires=" + d.toUTCString() + ";path=/";
    localStorage.setItem('tn_click_id', v)
}

sc((new URLSearchParams(window.location.search)).get("click_id"))
</script>
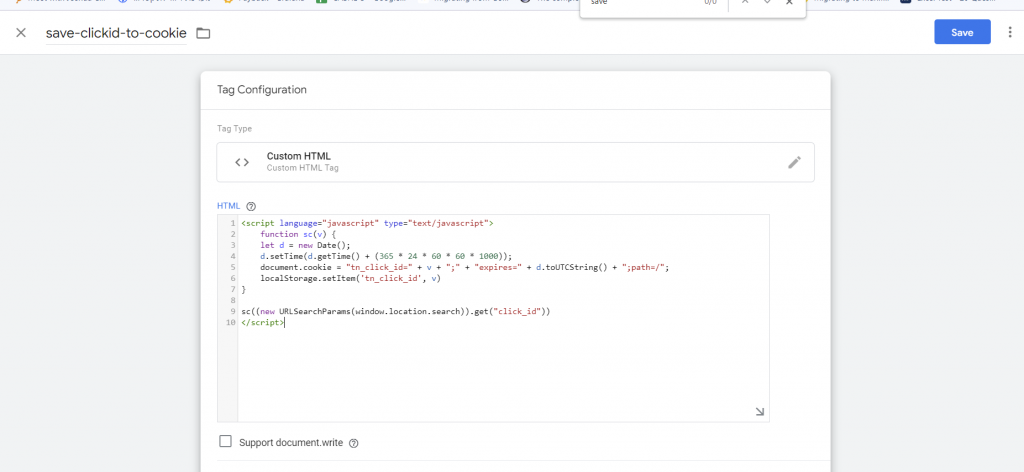
Note: you can change the Cookie expiration time. For the example above it is one month.
Select Triggering = Visitor from Affiliate. And click Save
Note: Please make sure at line number 4, as the value of the cookie is selected, the GTM Variable we created in the #2.4
- We now have our Click ID available on every page of the site within cookie parameters and can read it into GTM Variables.
Go to Variables, click on New button. Set name as Cookie-Click-ID (which means that this variable will be available on every page).
- Select Variable Type as 1st Party Cookie, Cookie Name as click_id. And click on ‘Save’.

- Set the Postback on the Conversion page.

If you have any issues setting up the GTM PostBack Tracking, please contact the ‘Tracknow’ Support Team by clicking ‘here‘, we will do our best to answer all of your inquiries.