Google Tag Manager is a tag management solution that allows you to set up and publish tags on your website or mobile app using a simple web-based interface. Tracknow has a gallery template that should assist you in installing the tag manager easily and reducing errors.
Integrating GTM Tag on Your ‘Thank You’ Page
1. First, navigate to the ‘Campaigns‘ section > ‘Add a Campaign‘ or ‘Edit‘ (for an existing campaign):
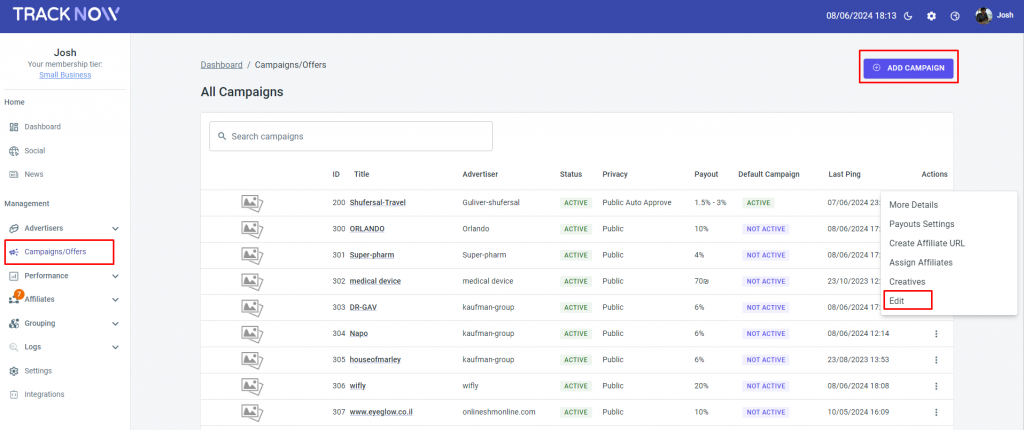
2. After selecting a campaign, click on the ‘Tracking‘ tab > scroll to the bottom of the page and select the ‘Image‘ section and copy the code.

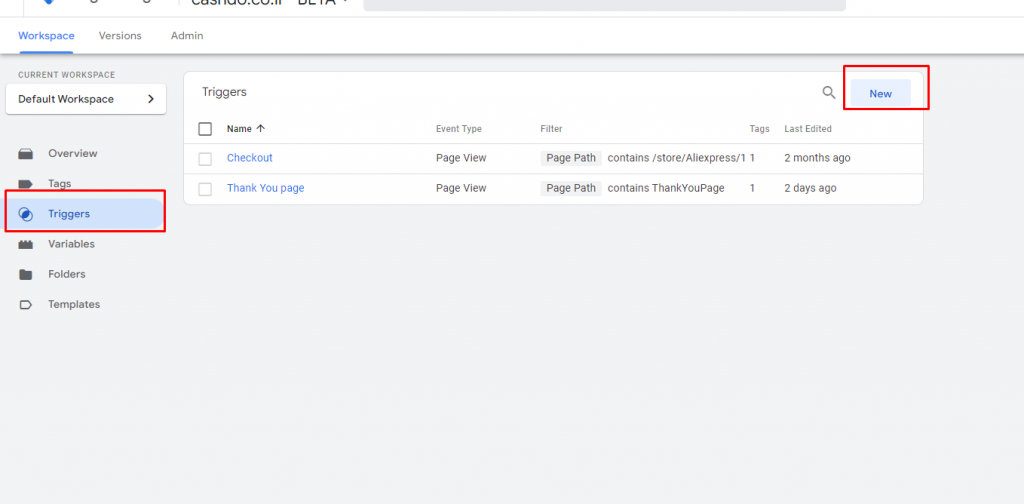
3. Let’s get started creating your tag on the ‘Google Tag Manager‘, the first step is to add a ‘Trigger‘.
Go to ‘Triggers’ and click on ‘New’:
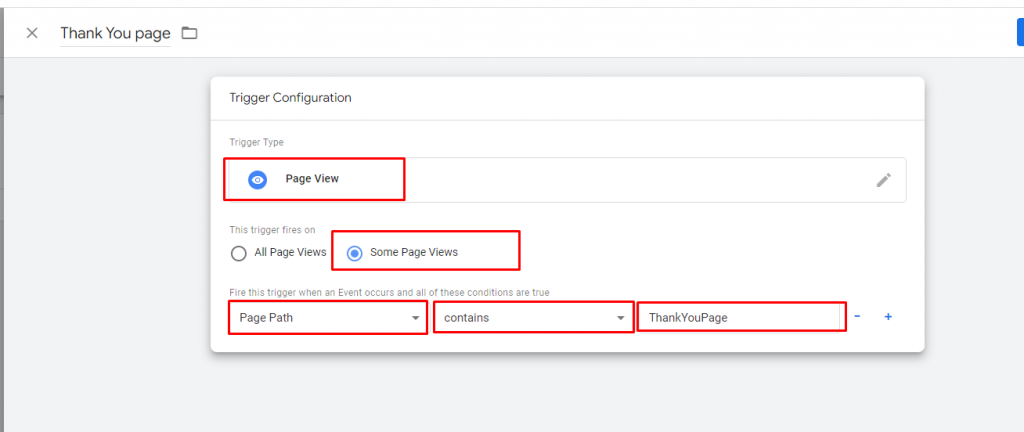
4. Select ‘Page View’ and add your ‘Thank You’ page HTML:
The 'Thank You' page is the landing page that appears after the customer has completed a purchase.
5. Navigate to ‘Tags‘:

6. Go to Tags and create ‘New Tag‘ type and select ‘Custom HTML‘
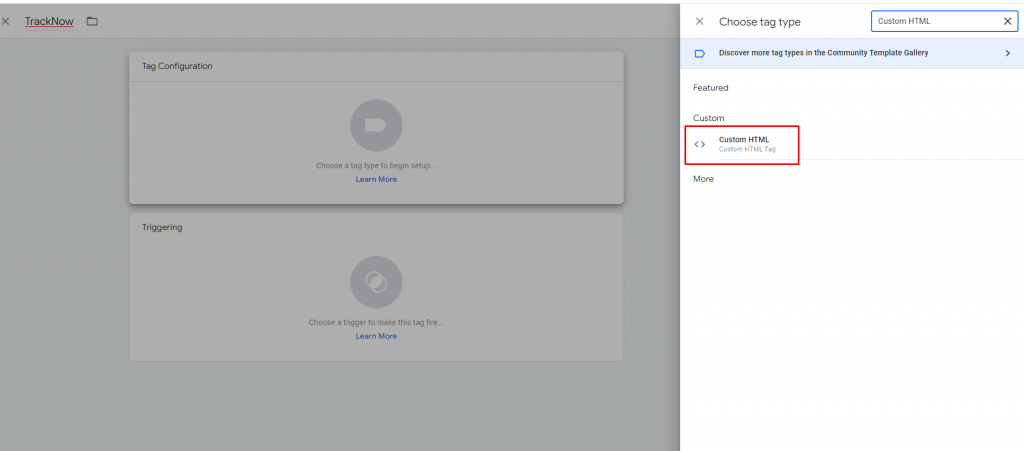
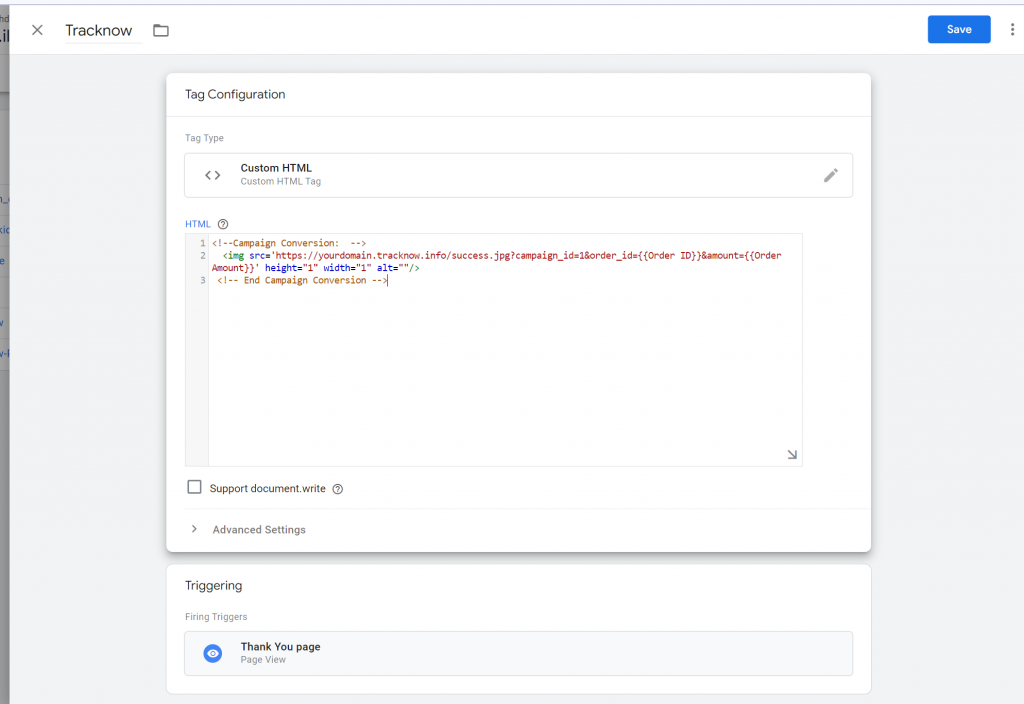
7. Add the Img pixel code inside the ‘Custom HTML‘ and select the ‘Thank you page‘ Triggering.
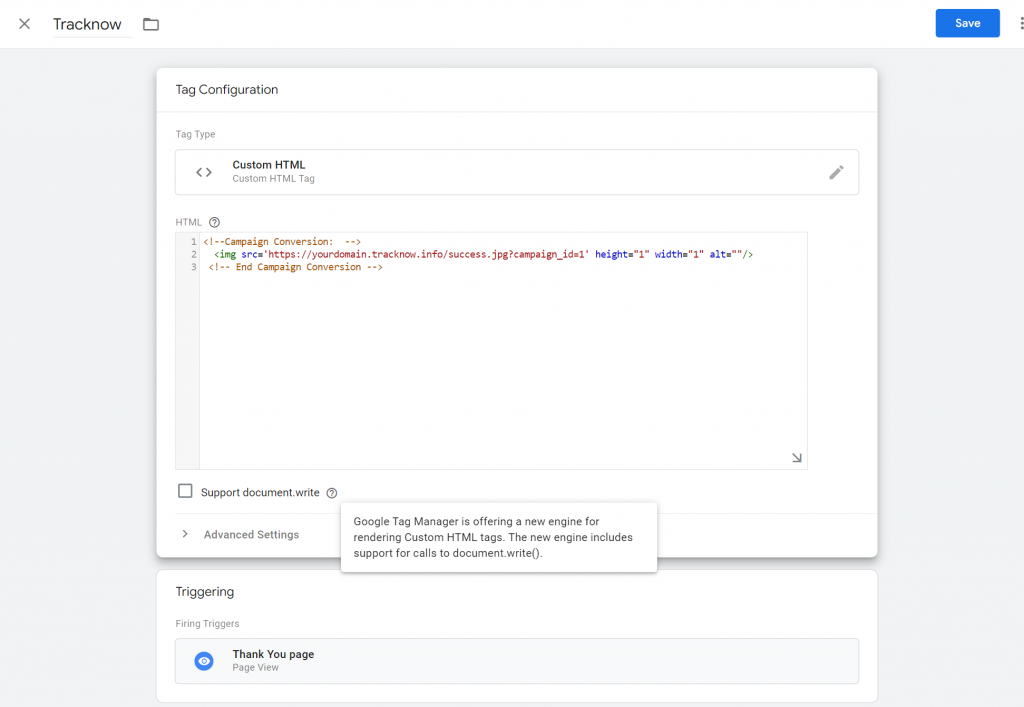
8. ‘Save‘ and your tag is ready!
Integrating GTM Tag with Parameters
If you have already sent the Order Amount and Order ID to the GTM, you can use the parameters within the GTM configuration.
Please see all the parameters that can be sent to Tracknow here: Postback/Tracking Parameters
An example of store that sending parameters to the layer of GTM:

<script type='text/javascript'>
   var order_amount = document.getElementById("order_amount").value;
   var order_id = document.getElementById("order_id").value;

  dataLayer.push({
    'order_amount': order_amount,
    'order_id': order_id });
</script>
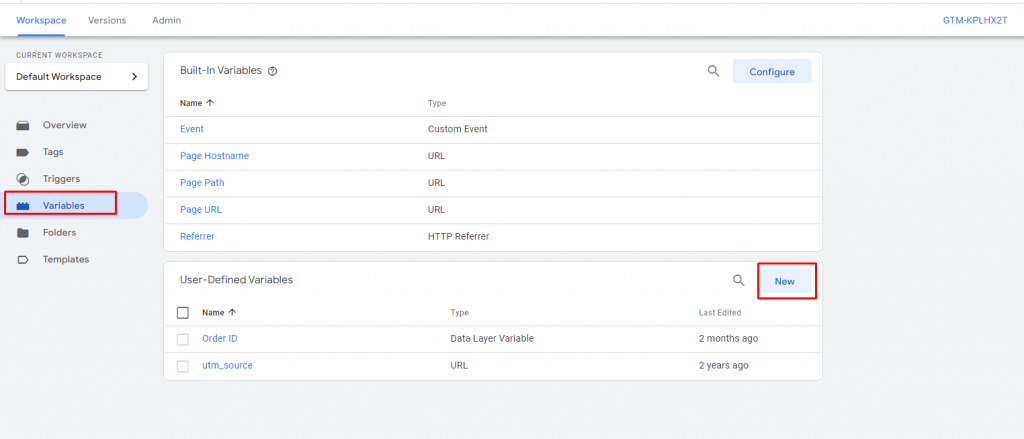
1. In GTM> go to ‘Variables‘ and click on ‘New‘:
2. Click on ‘Data Layer Variable‘:
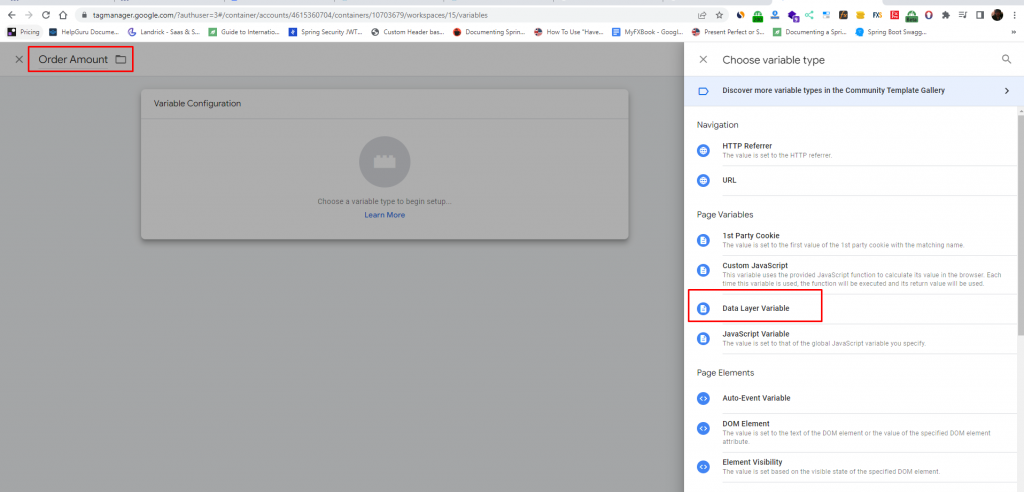
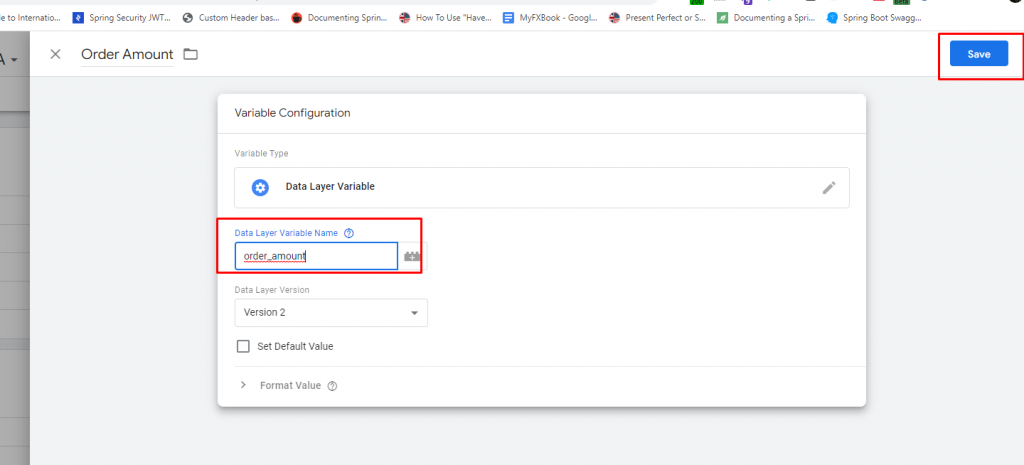
Do the same for Order ID and any other parameters you want to send to Tracknow.
3. The best approach is to install our Tag Manager template:
https://tagmanager.google.com/gallery/#/owners/TracknowLTD/templates/Tracknow_template
If you don’t want to install the template, skip this step and go to step 4.
Installing the Tracknow Template
- Navigate to ‘Tags’.
- Click ‘New’.
- Click on ‘Tag Configuration’.
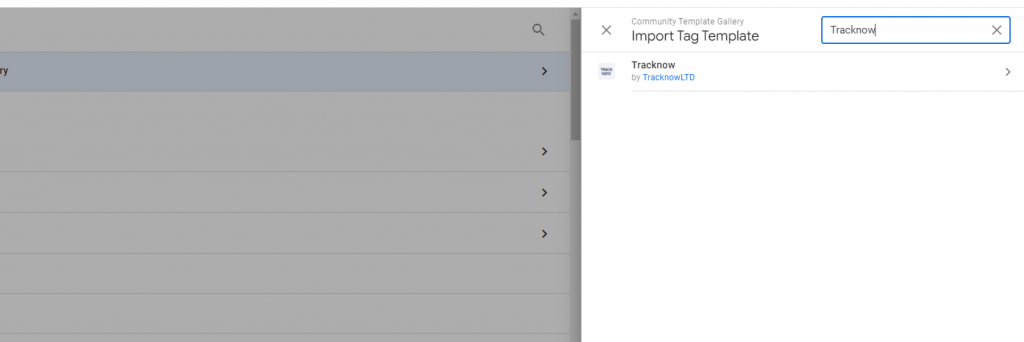
- Click on ‘Discover more tag types in the Community Template Gallery’.
- Select the ‘Tracknow’ tag.


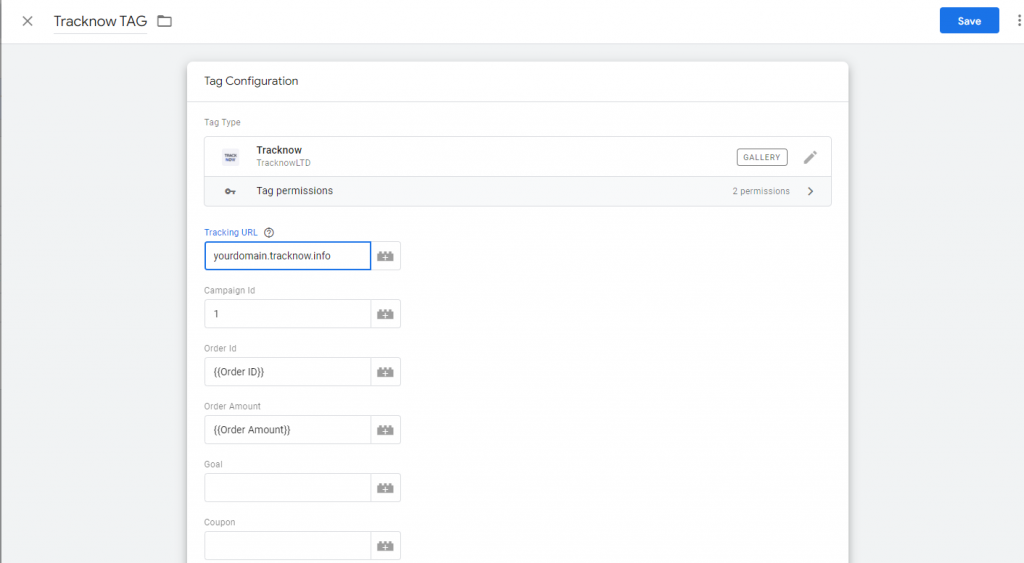
Place ‘Tracking URL’, ‘Campaign Id’, ‘Order Id’, and ‘Order Amount’ into the template.
Use the layer parameters from the Data Layer Variable.
4. if you did step 3, you can skip this step.
Navigate to ‘Tags‘ and use the variables contained within the Tracknow custom HTML.
<!--Campaign Conversion:  -->
  <img src='https://yourdomain.tracknow.info/success.jpg?campaign_id=1&order_id={{Order ID}}&amount={{Order Amount}}' height="1" width="1" alt=""/>
 <!-- End Campaign Conversion -->

If you have any issues setting up the GTM for Tracking, please contact the ‘Tracknow’ Support Team by clicking ‘here‘, we will do our best to answer all of your inquiries.
