Before adding an advertiser you must add a ‘Traffic Source‘.
Click ‘here’ for additional information about ‘Traffic Sources‘ and learn how to add it to your management settings.
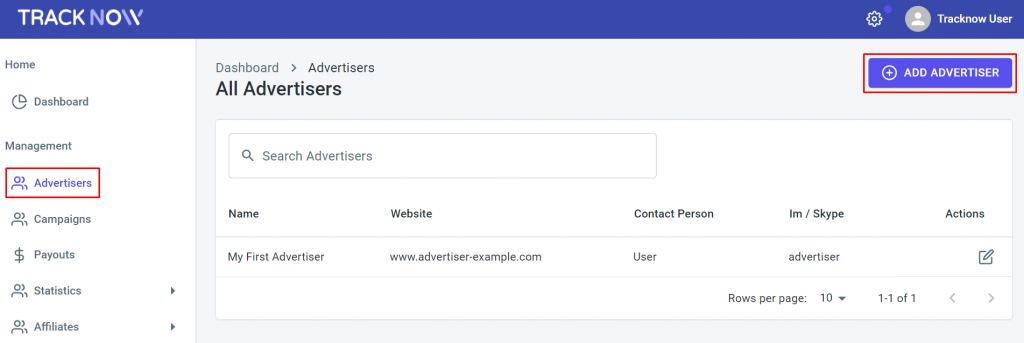
To add an ‘Advertiser‘ to your management account, select ‘Advertisers‘ and click on the ‘Add Advertiser’ button.
You are now presented with a form that requires you to fill out with the advertiser information:
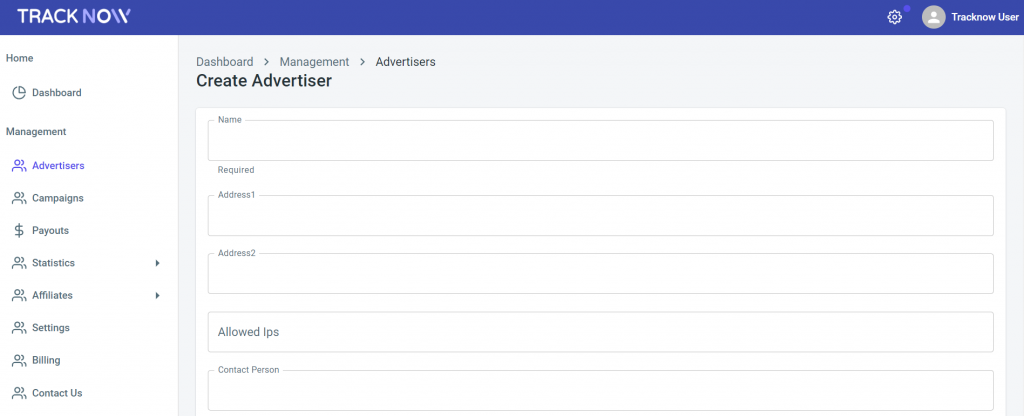
- Name – a required field: The advertiser’s name or the name of his/her company.
- Address1, Address2, Zip Code – an optional field: The advertiser company address.
- Allowed IPs – an optional field: You may specify authorized IPs addresses for the advertiser’s postback. A comma or hyphen may be used to separate several IP addresses or to add an IP range.
- Contact Person – an optional field: The contact person from the advertiser’s company.
- Im/Skype – an optional field: The advertiser’s Im/Skype details.
- Note – an optional field: You may enter notes here.
- Vat Code – a optional field: The VAT registration number of the advertiser’s company.
- Website – an optional field: The advertiser’s website.
Fill out all of the advertiser information and then click ‘Create Advertiser’ to save.

If you have any issues with the establishment an Advertiser’s account, please contact the ‘Tracknow’ Support Team by clicking ‘here‘, we will do our best to answer all of your inquiries.